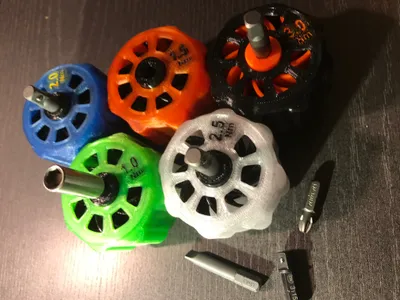
Maybe you have already seen my Magnetic Bit Driver Handle . Now here is an alternative version: The Stubby Magnetic Bit Driver Handle .
Features:
Can be used with every 1/4'' (6.35mm) standard bit
Bits are hold in place by a Ø4x2mm magnet
Read the full description
The clip-on endcap rotates for easy operation
Four small standard bits can be stored in the handle
Printable in multicolour or single colour (so, MMU/AMS is optional)
Only needs 29gr filament
Print preparation:
Make sure that your print bed is clean and grease-free and use a quality brand and dry filament. A quality filament is necessary because the seat for the magnet has tight tolerances.
Print settings:
Use the 0.2mm standard settings for everything. Support is not needed. A brim for the handle is recommended to increase the bed adhesion. Set the wall number to four for a robust print. 12% gyroid infill should be enough.
See my 3mf print profile (Orca Slicer or Bambu Studio) for details.
Assembly:
Optional: Install three Ø4x2mm magnets into the holes in the cap (same procedure as below)
Press the cap on the handle. It is a simple and removable snap-fit.
Place a Ø4x2mm magnet on the end of a bit and put the bit in the handle.
Place the other end of the bit on a stable surface and hit the handle slightly with a hammer.
Recommendation: Use my dead-blow hammer for this .
Now the magnet is pressed into the handle and your bit driver is ready to use. The magnet can easily be ordered anywhere on the Internet. Just make sure you get the right size: Ø4x2mm. You need one magnet per handle. Optionally you can install three magnets in the cap, too.
Disclaimer:
This work by blecheimer is licensed under CC BY-NC-SA 4.0 . The shown model is fanart and must not be used commercially. Copying this model to other 3D printing websites is not allowed without my permission..

 Thingiverse


 PrintablesFree


 Creality Cloud


 MakerWorld