
Printables
Ender 3 v2 Lightbar (With room for Tool Holder)
What you need 4x M4x12 screws 4x M4 T-Nuts (printed ones linked) ""printed ones not tested"" 1x 1'0.5" ft/31.750 mm of 17X8mm LED Aluminum Extrusion** 1x 1-2 ft of 24 volt LED strips 1x Rocker power...


- Creator (as listed at the source)
- Speaker-Doom
- Licence
- Creative Commons — Public DomainStated at the source marketplace; SliSearch does not verify licences.
- File types
- STL
- Pricing
- Free
- Published
- Category
- Creality Parts & Upgrades
- Likes
- 2
- Downloads
- 4
Overview
What you need
4x M4x12 screws
4x M4 T-Nuts (printed ones linked) ""printed ones not tested""
1x 1'0.5" ft/31.750 mm of 17X8mm LED Aluminum Extrusion**
1x 1-2 ft of 24 volt LED strips
1x Rocker power switch**
Wire -- enough to reach motherboard
** = Images provided for dimensions
Tool Holder Link
M4 Nut Link
Printed in PLA Plus
Standard print setting
Printing recommendations
Filament - PLA, PETG
Supports - Everywhere, No tree supports
Standard setting for everything else
Build Instructions
1. Stick light bar to aluminum extrusion
2. Insert light bar into the right side holder
3. Run negative wire to the back to the printer
4. Wire positive wire to rocker switch then run wire to back of printer
5. Run wires below Z axis mount
6. Run wires out above Z axis motor
7. Run the wires below the printer to the motherboard
8. Connect the positive wire to the positive dc voltage in
9. Connect the negative wire to the negative dc voltage in
10. close everything up and you are done
Print this with Prinnu
- Download the model file from the source page. SliSearch moves no files.
- Upload the file at slicience.com/quote. Prinnu quotes it in minutes.
Similar models
Chosen by shared tags first, then category. Each one links to its own marketplace.
 Creality Ender 3 Light Bar Brackets - Normal & MirroredThis is a 3D model of the side brackets found on the official Creality Ender 3 light bar upgrade kit. I designed this for three reasons: The original plastic mounts are prone to cracking, especially under tight screw...
 Ender3/Pro/v2 Lightbar MountBasic lightbar mount. This is the lightbar I'm using -> should fit any lightbar that is 15x15mm
 Creality Hi LED bar light bracketCreality Hi - LED light bar bracket I have other Creality printers with light bars, but the Creality Hi does not have a Creality Light bar like the Creality Ender-3 V3 Plus and Creality Ender-3 V3 KE/SE.
 ENDER 3 NG v1.2 - coreXY conversionE3NG / Ender 3 NG !CAUTION! Reprint and replace the electronics_DIN_rail_PSU_24V.stl from the bacpack + electronics folder if you already have the older version.
 Ender 3 V2 - VORON Stealthburner conversionYou need to print the Stealthburner files from the Voron website: Download the Stealthburner_Main_body and the desired files for the toolhead you are using.
 Ender 3 V2 CoreXY (2nd Gen)Hello E3V2 CoreXY fellow, I’m introducing the 2nd generation of Ender 3 V2 CoreXY conversion kit series, which is now available in a bigger frame and has two Z axis variations (TripleZ or Belt drive).
 Quieter Ender 3 V2 Fan ShroudIMPORTANT: One file uses a PrusaSlicer box modifier on the clip portion. If you use another slicer, this box will physically print out in place of the clip. Use the other 3MF file.
 Ender 3 V2 X And Y Linear Rod/Shaft UpgradeThis is a linear rod/shaft upgrade for the Ender 3 V2.
 Ender 3 Filament Spool Holder Upgrade / Držák filamentuMoving the filament holder from the top position to the side will increase the stability of the printer while improving filament guidance to the extruder.
 Ender 3 Bed Leveling Lock/DiscretizerThis is the top 100% recommended for everyone to use on their 3D printer it only takes a couple minutes to have it perfectly and completely locked in very nicely and it is a very handy 3D printer part.
 Ender 3 Direct drive mountIntroducing my latest 3D printing enhancement—a custom-designed direct drive mount for my 3D printer! This meticulously crafted mount seamlessly integrates into my setup, bringing unparalleled precision and efficiency to my printing...
 Ender 3 Extruder BackplateThis is a backplate based off of the original Ender 3 backplate. This does NOT include all the original holes and spots for screws, just the ones for the hotend and shroud as those are the only ones needed as far as I know.
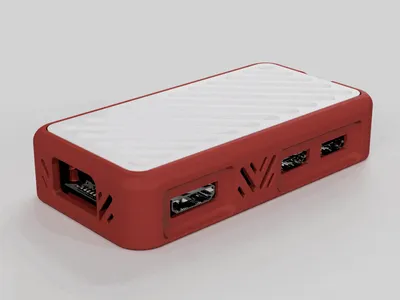 Raspberry Pi Zero case/Zero W case/Zero 2 W case (2h print)Pi case that i made in my free time :-)
 Ender 3 V2 V-Slot CoversNote: Highly suggest that you print a sample of the version you would like in order to have a physical model to test with before printing a full batch.
 Filament Guide for Ender 3 v2 / Pro / NEO / CR-X Pro (NO EXTRA NEEDED)
 Ender 3 LED Profile 2020LED Strip holder Versions for LED Strips + Endcaps. Choose your version. V1 , for LED strips to stick on. V2, for LED strips for lateral insertion. V3, for LED strips for lateral insertion,with LED diffuser insert.
 Knurled Control Knob + Knob Cap for Ender 3A quick print to upgrade the standard Ender 3 knob. Snaps on the original knob. The inner diameter of the cap is 25.85 mm UPD: another version to completely replace the control knob
 Belt Driven Ender 3/Pro/V2 and CR10Please visit my Github Page to get a better documentation of this mod! If you want to do me a favor and support my work, download this via my Printables Account , thanks!
 Ender 3 (Pro) Spring Guides
 Ender3 Filament Guide (Yep another one...)After a couple weeks using my Ender3 I quickly realized why there are so many filament guide accessories. The filament entering the feed gear housing was quickly cutting its way through the stock guide.
 Ender 3 V2 Filament Guide
 Ender 3 / CR-10 Extruder knobAn Extruder knob for the Ender 3 and much more 3D Printers tested on 0.2 and 0.3, but i recommend printing it 0.2 No Support needed
 Ender 3 Screen CoverIf your like me and sometimes find the blue light of your printers screen annoying I have the solution for you. The cover fits easily into the screen casing and blocks the light coming from it.
 Ultimate Ender 3 Bed Leveling KnobThese wheels have a locking mechanism built in so they remain where you set them indefinitely. I also prefer feeling that I should go up/down one or two clicks during the process of leveling, it helps me level much faster than I could with...
 Ender 3 v2 Psu 80x80x25 Silent FanRemix of another cover, but made for a bigger fan 80x80x25 since they are more silent than the slim fan. This will require you to raise the printer. I made these legs for my Ender 3 v2.
 Ender 3 V2 - Cable-Clip Hotend (Kabelführung)Redesign of some cableclips for the Ender 3 V2 that replaces zip ties to keep cables together with PTFE tube running to the extruder. These clips open at the bottom and won't brake that fast.
 Ender 3 Pro Case Extended Remix (Stock, SKR 1.3, Mini E3, MLK + Raspberry Pi 3/4)SUMMARY I've remixed the original case design to support additional accessory hardware mounts, add support for stock layout boards such as the original Creality boards and SKR Mini E3 etc, add support for the new Raspberry Pi 4 and fix a...
 Minimalistic Ender Bed Handle (snap-on - no new leveling)
 Creality One-For-All Spool HolderA spool holder for Creality 3d printers that will solve 3 common problems. 1- Will hold spools that are wide 2- Will hold spools that have a narrow inner diameter 3- Will minimize friction Print the 6 parts and assemble with 2x 608ZZ...
 Ender 3 light switch mountSmall & discrete mount for a rocker switch 6.5mm x 19mm) used to switch LED lights on/off. Designed to front-mount the switch unobtrusively on the side of the ender 3 control panel so that it is easy to reach and use, but also discretely...
 Ender-3 V3 Plus Mod CollectionNote: This only fits the E3V3 Plus printer. For the smaller E3V3 printer see my collection here: Ender-3 V3 Mod Collection A collection of aesthetically pleasing upgrades and add-ons which are, to me, pretty essential.
 Ender 3/3pro/3v2 Double Drawer v2I previously had the Ender 3 pro OEM screen, which I went on to print storage drawers underneath it. Those provided great onboard storage. When I added the touch screen (I lost the ability to use those drawers).
 Ender 3 Tooly-HoldyYet another in the myriad of tool holders available for the Ender 3. Uniquely however this is the only one that incorporates the excellent Needly-Holdy.
 Ender 3 V2 - Filament Guide for Dual Gear ExtruderEnder 3 V2 - Filament Guide for Dual Gear Extruder I designed this filament guide to feed an aluminum dual gear extruder I added to my Ender 3 V2. These are the commonly bought extruders for Ender 3's.
 Satsana Ender-3 V2 Fan Duct XHere's the fan duct for the Ender-3 or the Ender-3 V2.
 Ender 3 v2 Mainboard 80x80x25 Silent FanWARNING: when you wire in the fan, do NOT use the normal controllable fan port. Use the Hotend port which is always on. Using a controllable port + Buckconverter can blow the microfuse on your board.
 Ender Storage Box embossed/debossed options + Steps File
 LED Light Bar Prusa i3 MK2/MK3Light bar for the Prusa i3 MK2/S and MK3/S available in single light, dual light, and MMU2 compatible dual light versions.
 Ender 3/Pro LEDhey there = 0 i print it on its back with support from the build plate (10% density). its quite a lot of supports but its really worth it!
 Filament roller for Ender 3 v2One filament guide to rule them all! This is a single, angled filament guide that can replace many two-roller filament guide setups.
SliSearch is an index: it stores public metadata only, does not host files, does not verify licences, and has no partnership or affiliation with the indexed marketplaces.